

I juuuust got back from a whirlwind trip to look at a new project. My parents are downsizing (see more on how to prepare for downsizing HERE), and we went down to look at the new property that just became available.
Our host at the building was a bit anxious about showing us the unit as on the walk to see it he kept emphasizing that it was what he would term a “fixer upper”. He was not wrong…I reassured him that this was a good thing. There is nothing better than an opportunity to start fresh!
I don’t know when this building was constructed, but given the vintage of what was in the unit, I’d say probably at least 30 years ago.
It was firmly rooted in the honey oak and tuscan beige era and I don’t think it has ever been updated. The walls and trim everywhere were scarred from losing in a bumper car tournament…most likely damage inflicted by an electric scooter.
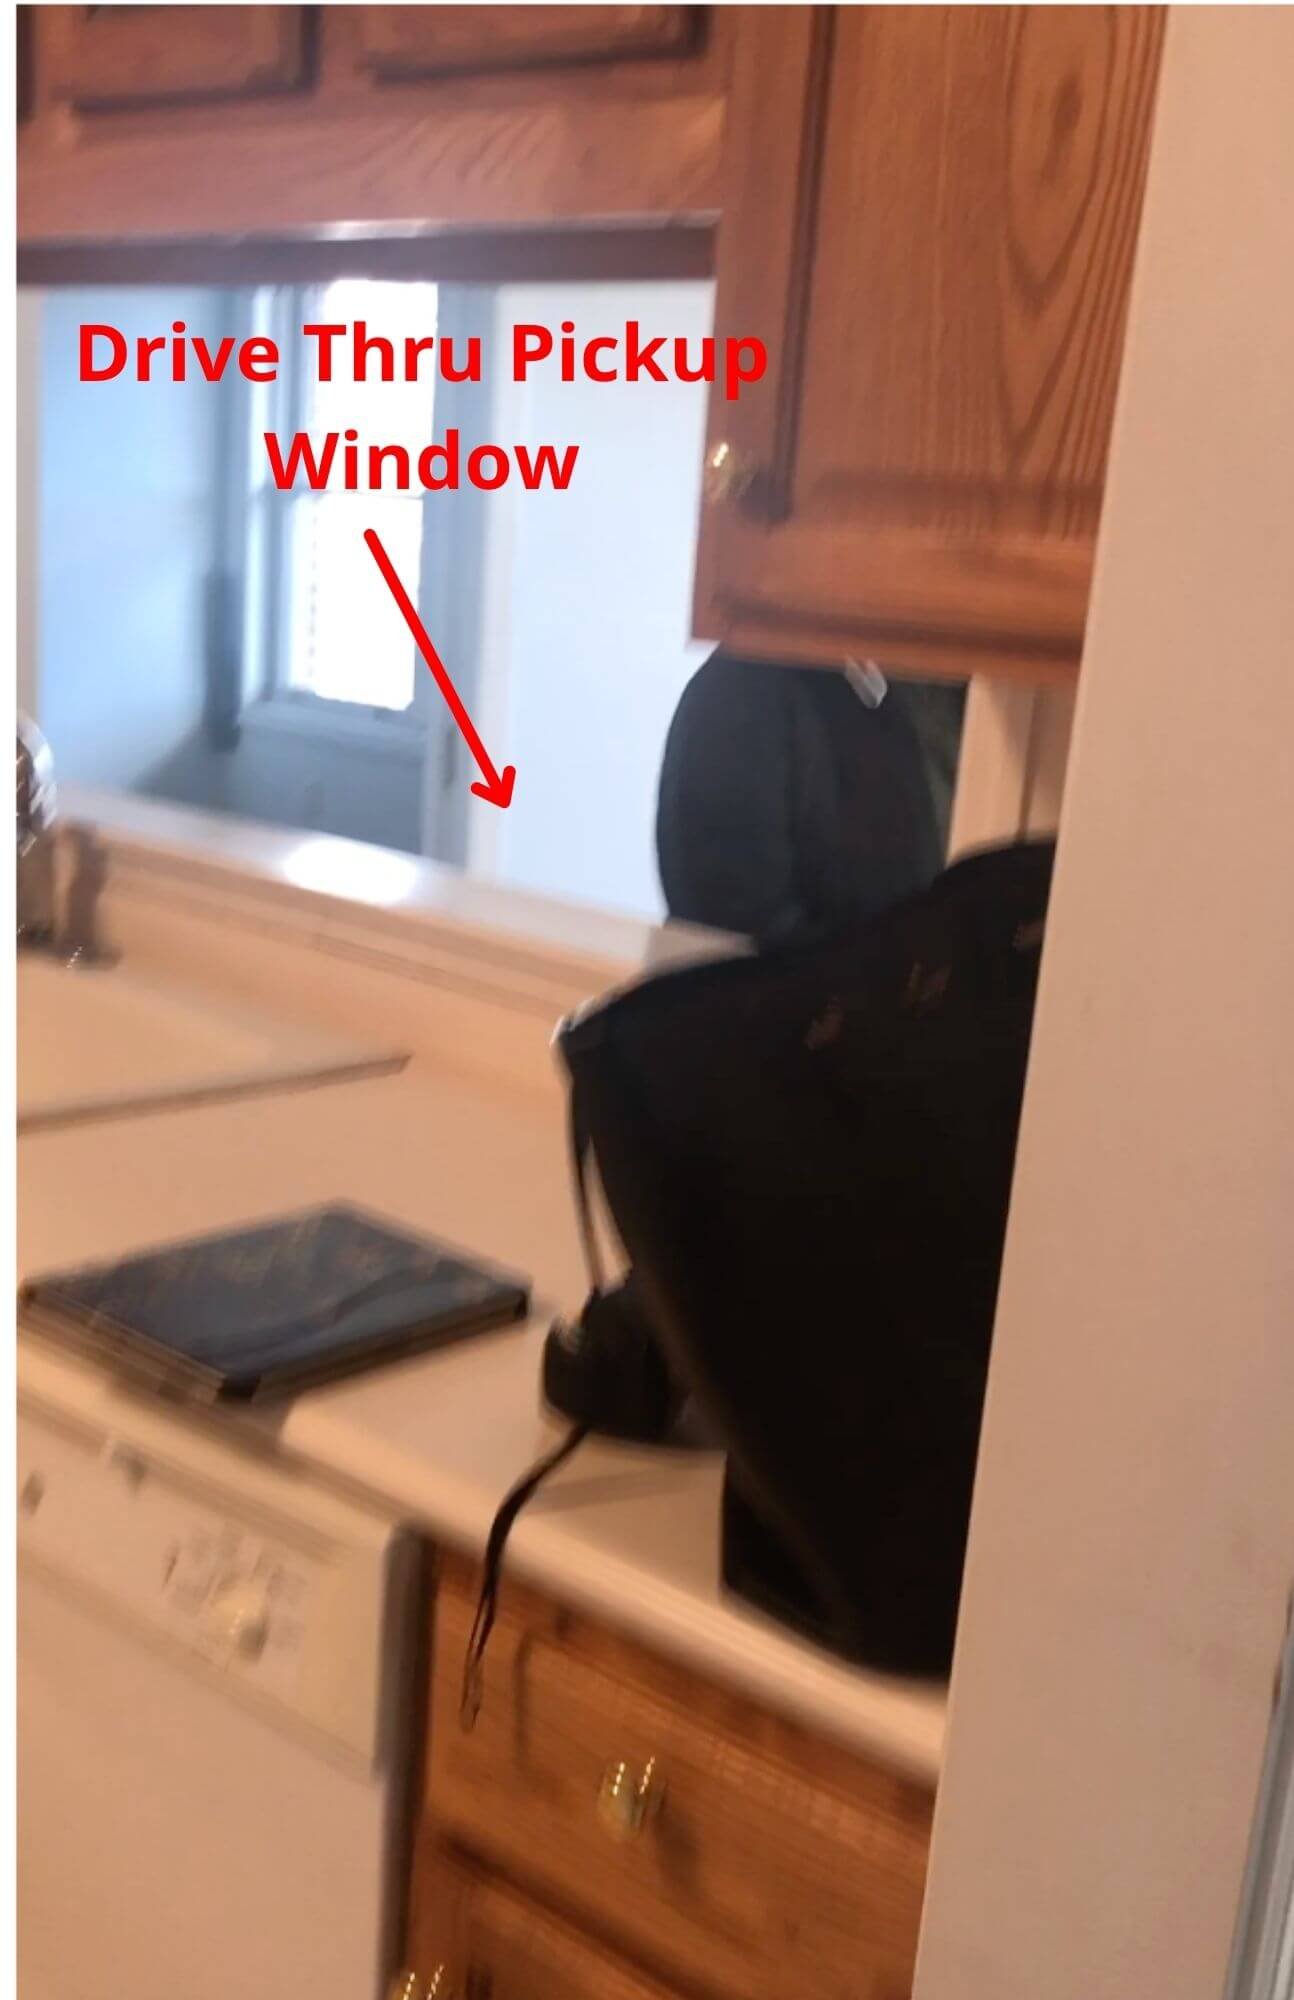
Wendy’s drive-thru window…
When we arrived, the place had been emptied out and the carpeting stripped. The telltale vintage was the state of the kitchens and bathrooms.
Fortunately, part of the deal is that the unit will be renovated to our specifications, and the complex employs the renovation staff full time so there’s none of the insanity of scheduling contractors and subs - a HUGE blessing right now!
The less ideal situation is the timeline. We need this to be ready in early May to meet their move date and we need an entirely new kitchen and bathrooms, which involves cabinet and appliance lead times.
We had already selected the cabinet finish, flooring, and countertops from the menu of options when we thought, earlier this winter, we were going to be renovating a smaller unit. They think the cabinets may be available within 6 weeks, but if I want the final say in the cabinet layout, and I very much DO (because the current layout is definitely lacking) we need to have the cabinet order ready ASAP.
In addition to the kitchen, I’ve rearranged a few walls to make a better laundry closet situation for them and just need to work on a few remaining details for the bathrooms.
We’ve got a bit of time for the rest - planning the lighting and selecting fixtures, measuring for window treatments, and choosing paint colors and any additional furnishings.
Always Measure
Now that I have accurate measurements, I’ve also been able to do proper furniture layouts and am delighted to report I can get everything in they want to take and make it look great 😊. NOTE: real estate plans always have measurements, but, and I can’t emphasize this enough, DO. NOT. TRUST. THEM.
Always take your own site measurements. Even blueprints are often inaccurate as changes sometimes get made during construction for any number of reasons.
For a space like a kitchen, where there are wall to wall built-ins and every inch counts, measurements are mission critical!
Even if you are moving walls, you still need to know what the available conditions and parameters are.

The Current State of Affairs
In this corner apartment, the living and bedroom spaces wrap around the outside corner of the unit and have nice 9’ ceilings and are flooded with light all day long from southeastern and southwestern exposures. The core contains the entry, kitchen and bathrooms, and this section has 8’ ceilings to accommodate all the ductwork.
To say the current state of the kitchen is dismal, would be an understatement.
Views
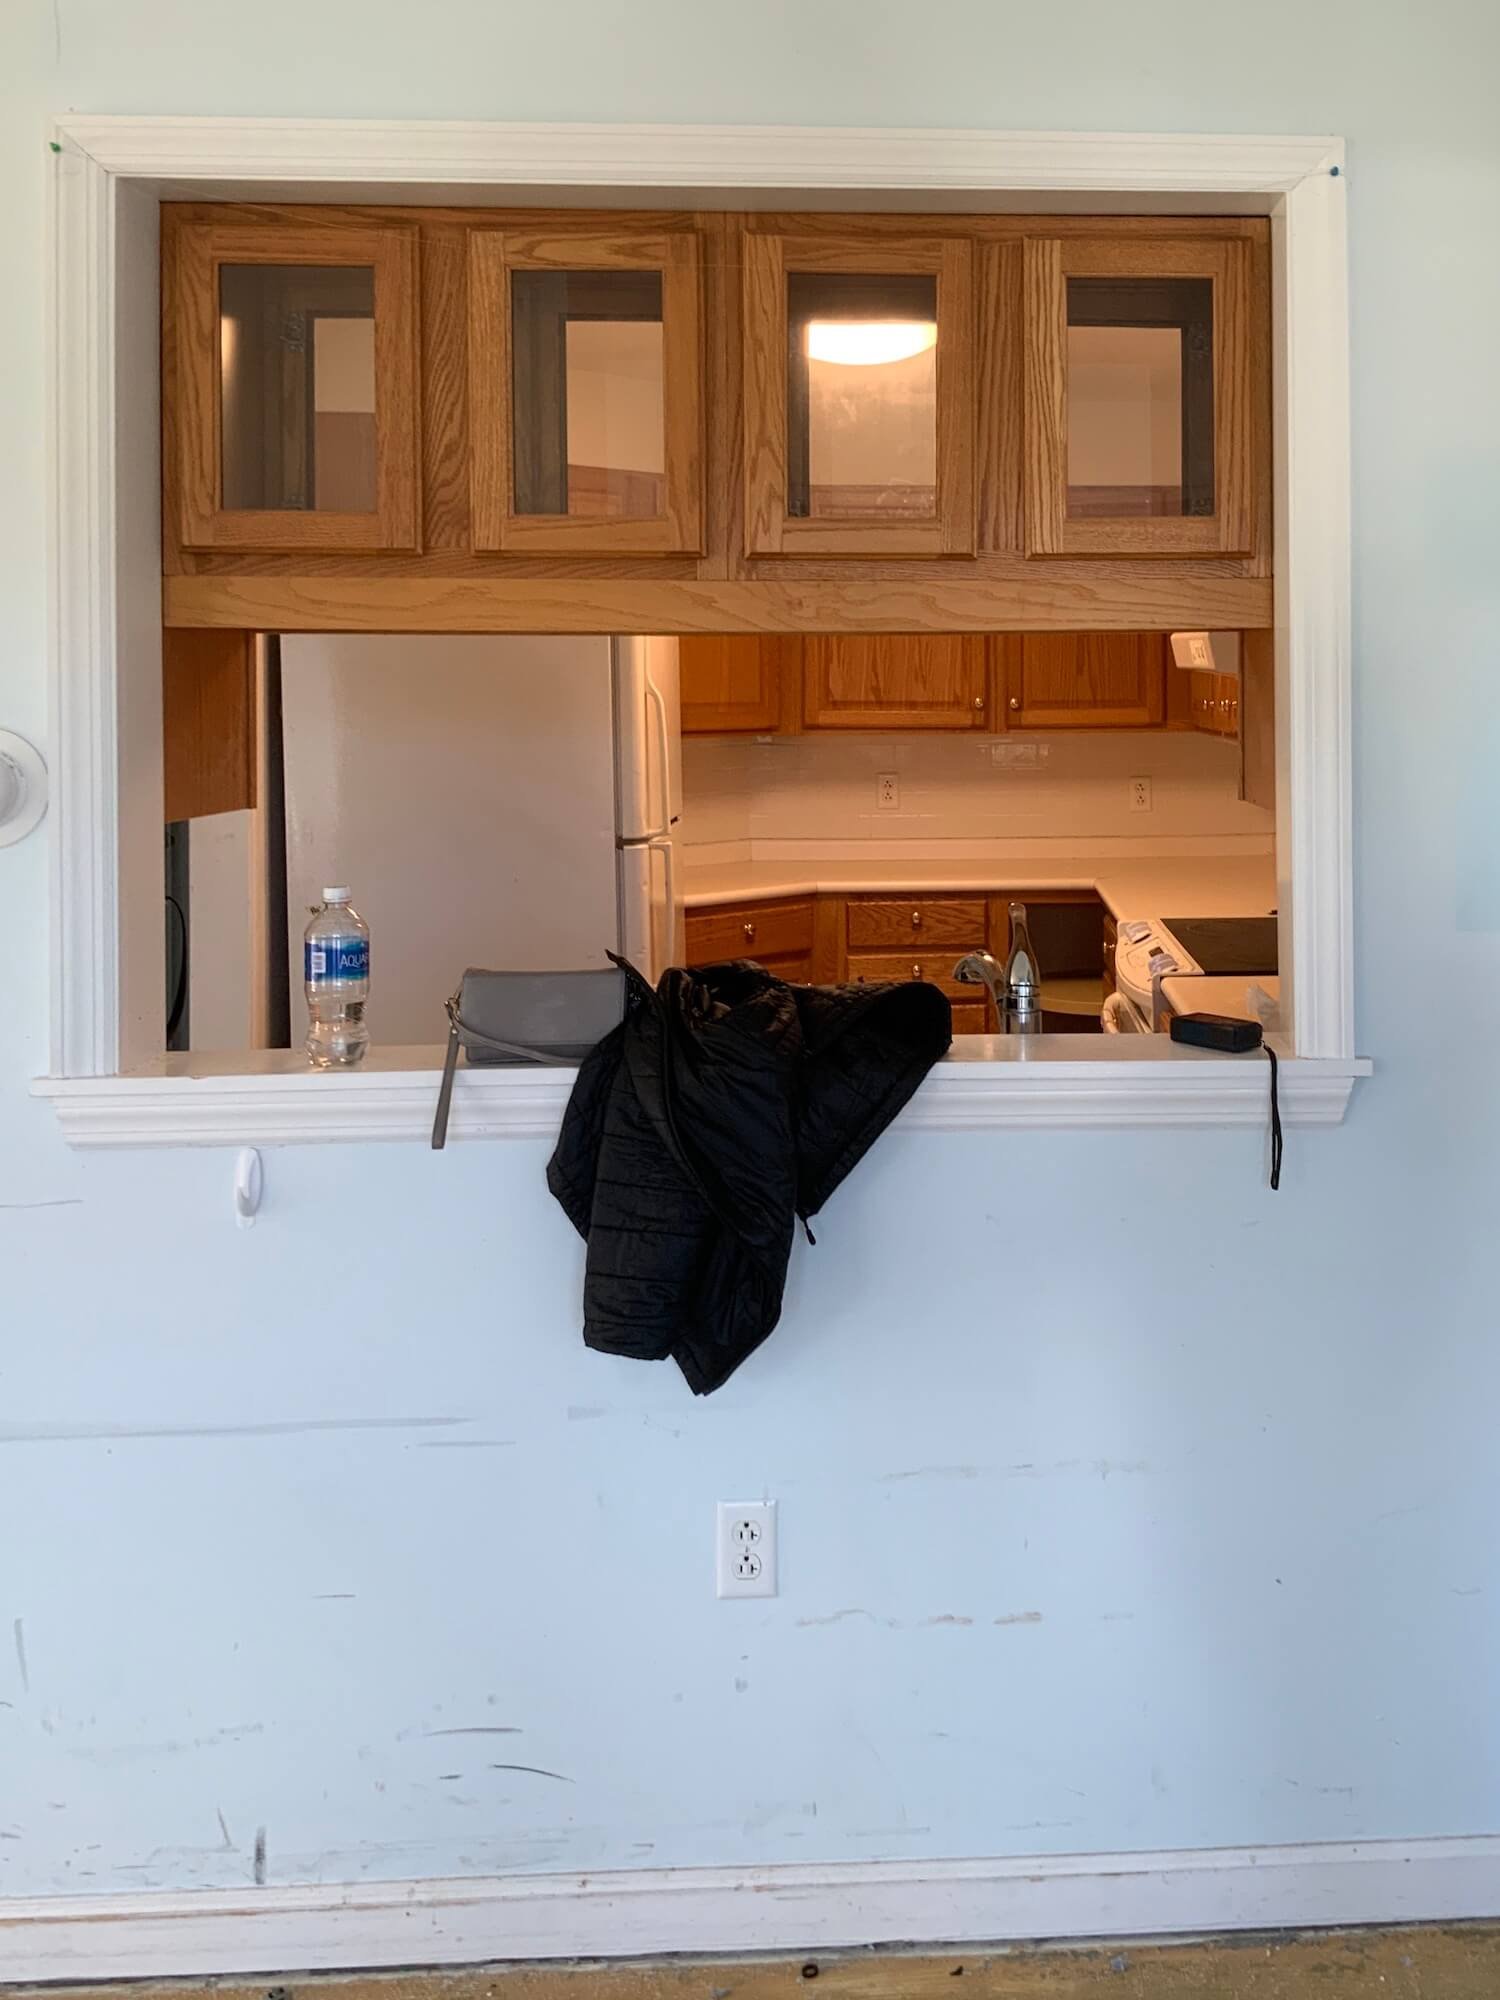
A hulking standard refrigerator blocks the view of most of the kitchen from the doorway and makes it feel cramped.
Double sided cabinets, which I’m sure were innovative at the time, encroach on the fast food drive thru window/pass through that faces the main living space and lets in all the natural light. You must be under 5’ tall to use this window, and then you couldn’t reach those cabinets?!
Cabinets
The upper cabinets are the shortest standard length (30”) and topped with a soffit - another throwback to an era. That soffit will definitely be leaving in favor of taller cabinets capped with simple crown moulding to the ceiling for an elegant tall line AND more storage space.
The current cabinet layout is plagued with an abundance of blind corner cabinets creating unreachable black holes where seldom used appliances go to die. It also contains the worlds largest collection of awkwardly placed filler panels. The upper and lower cabinets don’t line up and the whole look is a bit haphazard in addition to being woefully dated.
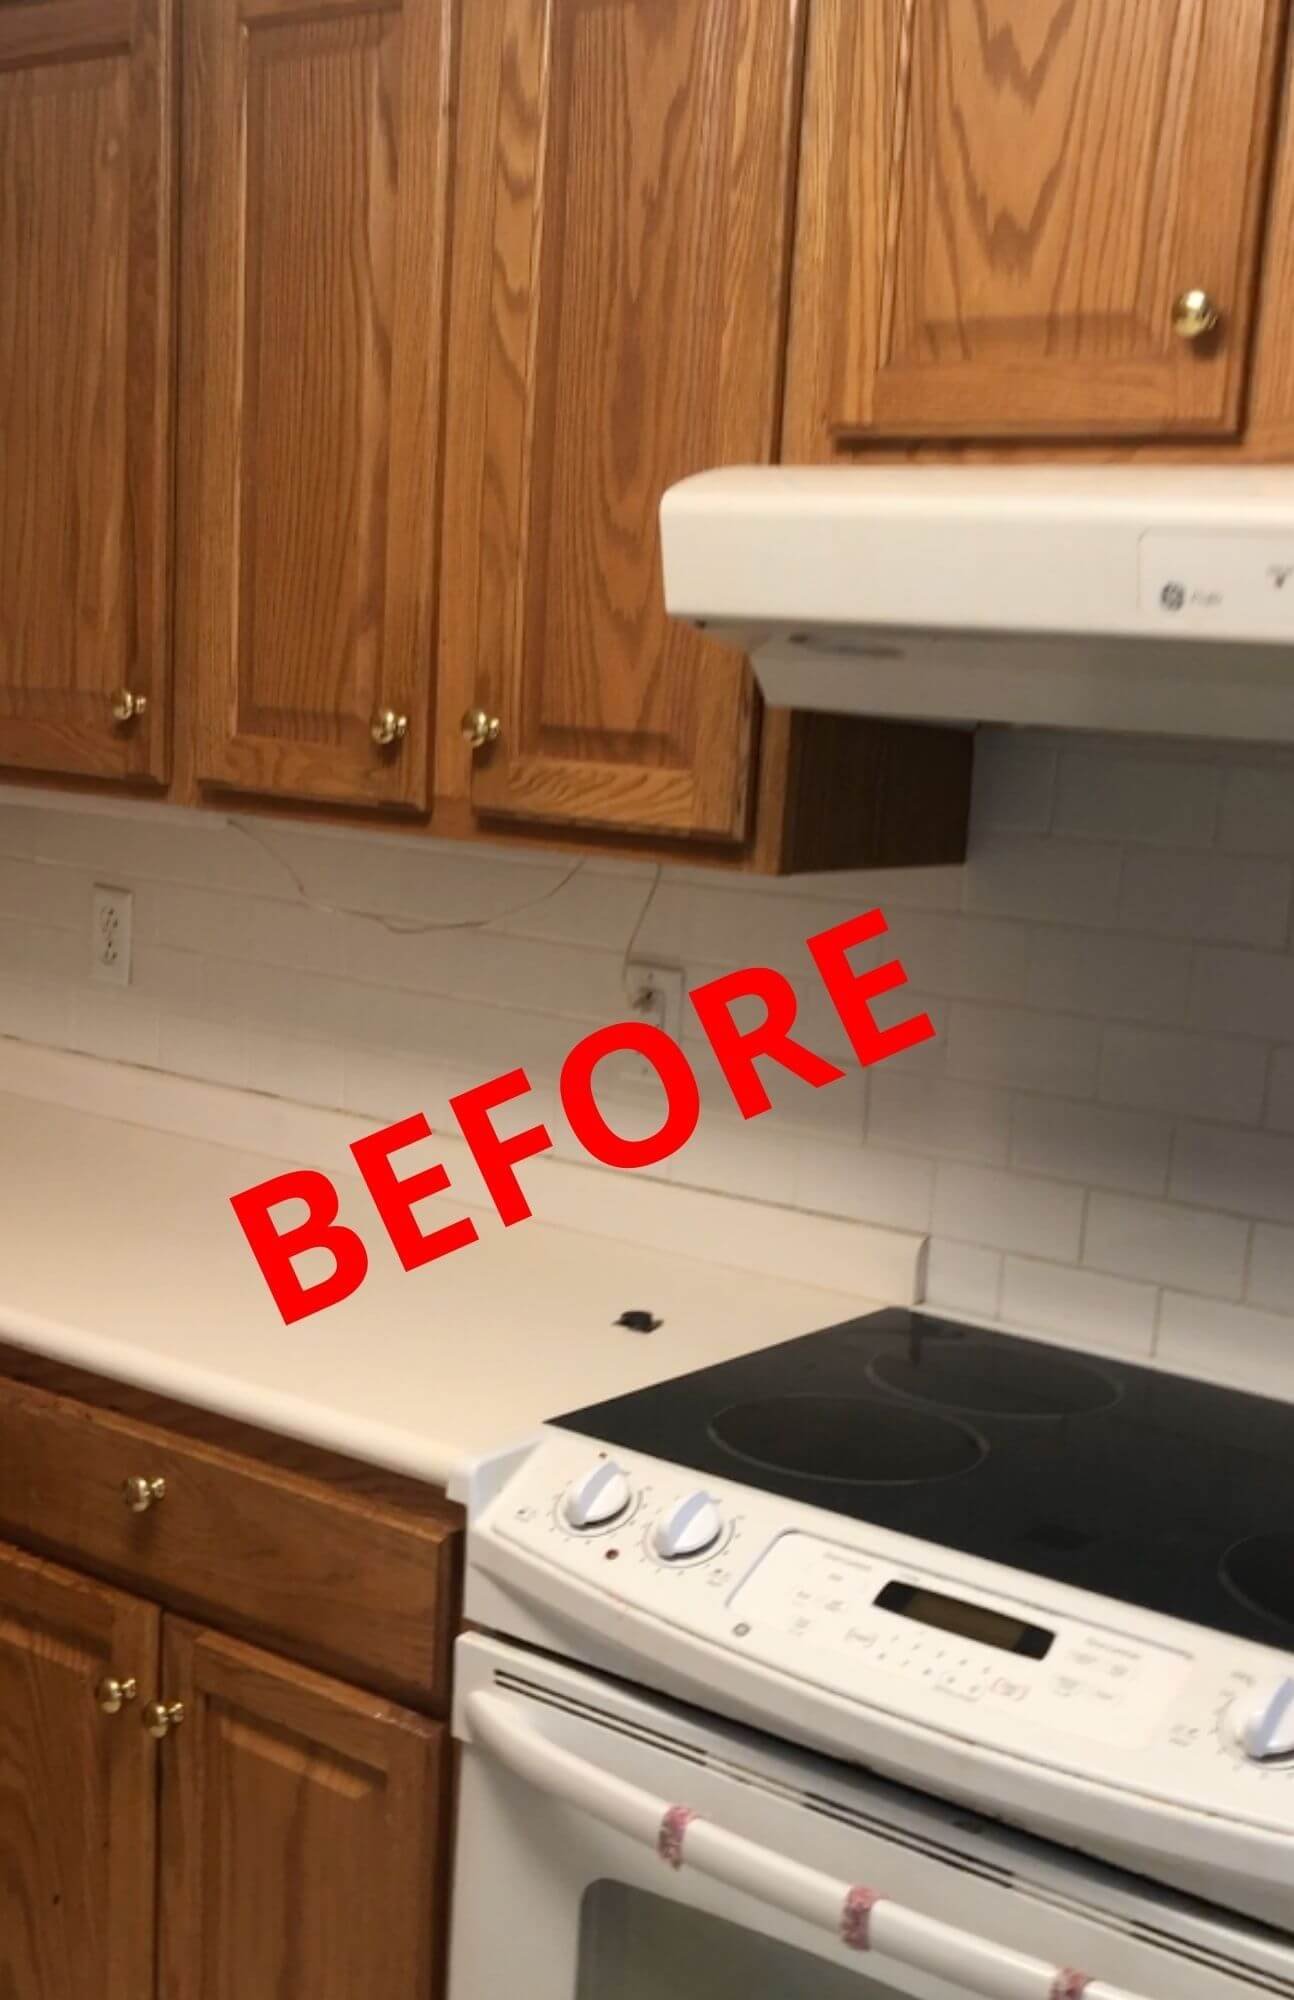
Appliances
The fan/hood that is what might generously be called ‘vintage’, is above an electric range. My parents have been cooking on a gas cooktop and moving to electric is a definite step down on the culinary ladder. Gas is not available here. We will be specifying an induction range to give them the speed and control of gas that they are used to, but without the open flame or fumes or PITA grates to clean.
And the fan will be replaced with an over the range microwave as we don’t want to sacrifice cabinet or counter space for it. A stunning hood would be my first choice, but in a small space, functional priorities win.
The bulky refrigerator will be replaced with a counter-depth French door model.
Lighting

The current lighting is both glaringly bright and harshly unpleasant - coming from a single oval fluorescent interrogation fixture hovering in the center of the ceiling like a UFO trying to beam up earthlings. Needless to say THAT will be leaving.
All rooms need 3 types of light: general, task, and accent light. In the kitchen, getting this right is life or death…I mean this is a room with sharp knives…you NEED to see what you are doing! We’ll use an array of LED recessed floods on a dimmer for general illumination, LED strips of under cabinet lights to light the countertop work space, and a pair of decorative library sconces over the sink. This approach of layers of light allows a variety of levels to adjust to every situation and mood.
Kitchen Layout
Measuring just shy of 12’ by just over 8’, the kitchen is not a large space, and with one angled wall, it is a challenging space to arrange.
I did a layout study with the fridge in the end, but this created an awkward less usable corner and required a smaller fridge.
And I tried a completely new idea creating a galley kitchen and eliminating the angled wall altogether by creating an opening on both ends. This makes for a nice open layout and a pretty look, but from a practical standpoint for people who like to cook and bake, it sacrifices a lot of counter space and some cabinet storage. The sink also faces a blank wall rather than a view.
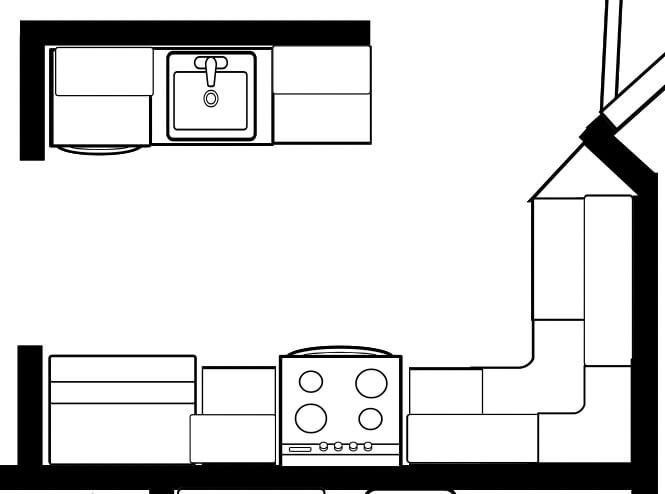
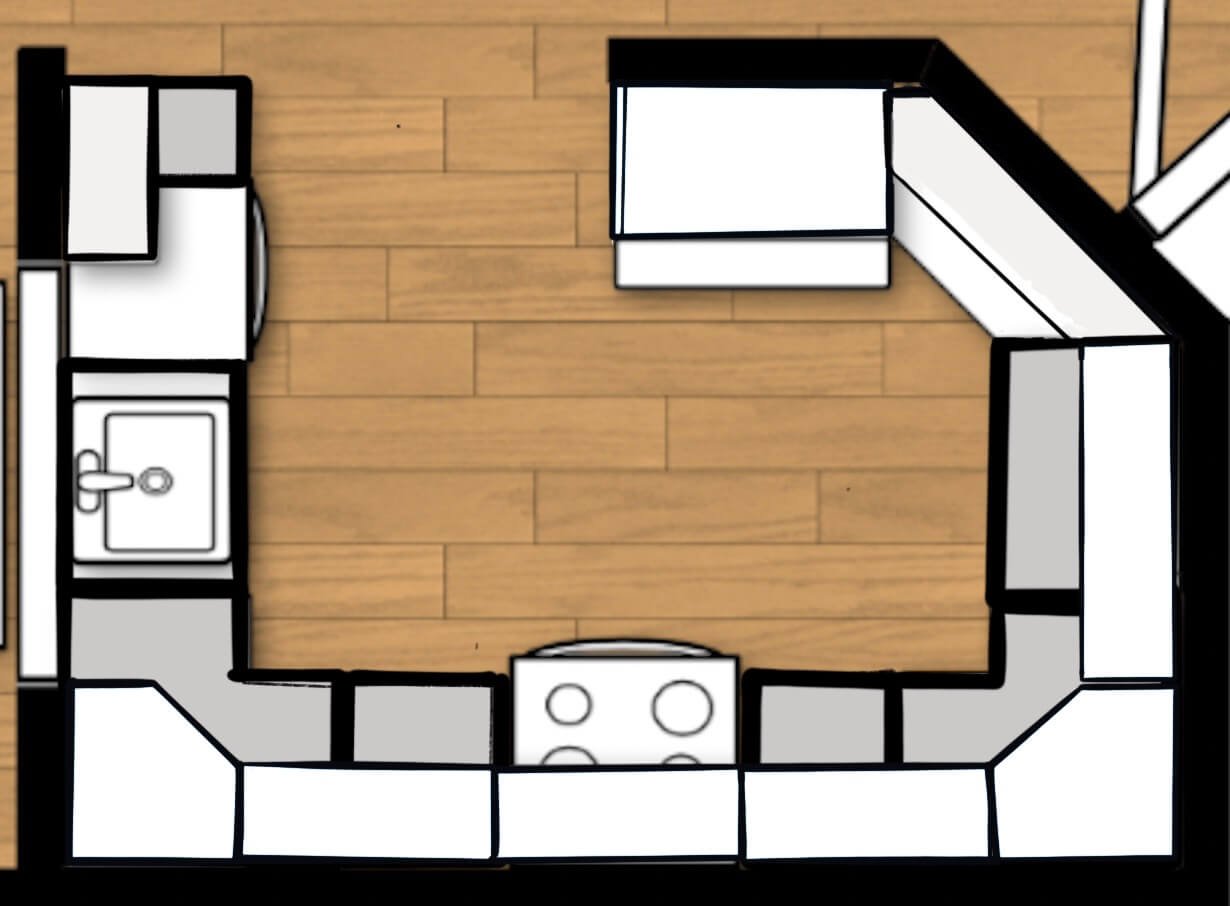
The extended U shaped layout of the existing kitchen still produces the most generous amount of counter space, and with some tweaking, allows for a nice amount of usable cabinet space as well.
If I had the option of some customized cabinetry, I could reclaim more of the wasted space from the angled wall, but alas, that will have to wait. Time is of the essence here.
I’ve opted to fill the awkward angle with open shelving, and a shallower counter. This will create some easily accessible storage for glassware, mugs, and cereal bowls next to the fridge and an out of the way space for a breakfast and coffee bar with the toaster and Keurig.
Color Palette
The main living area colors are dictated by the furnishings we are bringing in the move. These are mostly from a formal living room and feature pastel sherbet shades of pink and mint with cream, touches of black and cherry wood. In ANY home, but especially in a small and open space, the color and materials palette needs to flow throughout the space.

The selections for the kitchen are based on the colors throughout. We’ve chosen primarily light bright neutrals for this internal room since it relies on borrowed natural light. And we’ve selected the green from the furnishings and rugs in the living area as the perfect kitchen accent color. Green is natures neutral so a perfect choice for a kitchen!
It’s been a crazy week, but I’m excited to see this project get underway! Stay tuned for updates!
